


Bay Area Popcorn Ceiling Removal
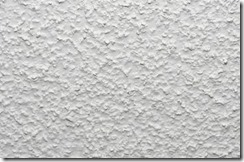
Popcorn, or acoustical, ceilings are long out of style. For a number of decades, popcorn ceiling texture was the standard coating method for ceilings here in the Bay Area (and across the country). Now, however, many homeowners are shaking their heads and wondering to themselves, “How did this ever become popular?” The new trend is towards smooth ceilings, or knock-down texture often painted white. Fortunately, popcorn texture can be removed, and your ceiling can be re-textured and painted.
Before You Start: A Warning about Removing Popcorn Ceiling Texture
Regrettably, it is not only the style of ceiling choice in the past that haunts us now, but also the materials. Most popcorn textures installed before 1985 contain asbestos, which can be released into the home during the removal process. Also, ceilings painted prior to 1978 are likely to contain lead. This means that if your home was built before 1985, it is much safer to have a lead-safe certified and asbestos-trained contractor do your popcorn texture removal.
Easy Steps to Remove Popcorn Texture on a Ceiling
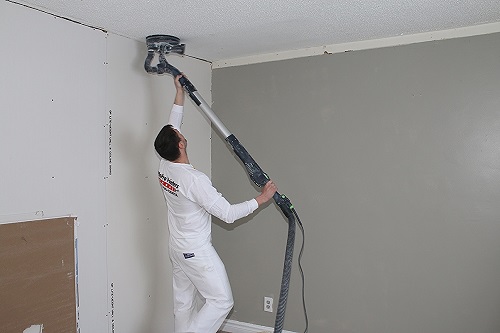
This is a messy project, so make sure you wear old clothes, and begin by protecting the walls and floors with plastic and tape. Cover or remove furniture.
Happily, there are no harsh chemicals needed for this. Simply wet the popcorn material thoroughly, and then use a wide-bladed putty knife to scrape off the texture before it dries. The best way to wet it is with a pump-sprayer, which easily controls the flow. Work in patches about 4 feet square, otherwise the texture will dry before you get to it. Try to avoid scraping directly above your head!
Once the scraping is complete, there will probably be some damaged areas to fix. Make sure there is secure drywall tape over all the joints. If there are any gouges or scratches, patch and smooth the area with drywall compound and a putty knife. Sand it smooth when dry. One way to avoid making extra scrapes and gouges as you work is to file the corners of your putty knife to make them slightly rounded.
Make sure to prime your ceiling before you paint it. You will want a flat latex interior paint to finish the project.
Next Up: Painting Ceilings
Once you have a smooth, flat ceiling or textured (knock-down texture is most popular in the Bay Area) choose a paint color that coordinates with your walls and furniture. In most rooms, the safest choice is a lighter shade of the wall color. Otherwise, you can choose a color that works well with your furniture or some other element in the room. Just remember; a lighter color on the ceiling will make the room feel taller.
Should I Hire a Professional House Painting Contractor?
There is nothing very complex about this process, as long as there is no lead or asbestos involved. Nevertheless, it takes a great deal of skill and experience to achieve an end-result that really looks good. Also, with a time-consuming and messy project like this, you may find yourself wishing you had never began the project to begin with. Hiring a home painting company that specializes in exterior and interior painting services will ensure that you receive fantastic-looking results, and in a much shorter time than you could do it yourself. You can find a local, professional painter at www.findapainter.com.
Colorblast Painting is a member of the Painting and Decorating Contractors of America and is dedicated to quality in all that we do, including every stage of surface preparation. Painting the interior of your home isn’t our only specialty. We excel at enhancing your home’s value by updating the exterior paint of your residence, too. Here in the Bay Area, we take every step necessary to ensure fantastic results. Based in San Leandro, CA.
Recent Comments